Apache Atlas安装和配置 |
您所在的位置:网站首页 › solr 启动timeout › Apache Atlas安装和配置 |
Apache Atlas安装和配置
|
Atlas概述 Apache Atlas为组织提供开放式元数据管理和治理功能,用以构建其数据资产目录,对这些资产进行分类和管理,并为数据分析师和数据治理团队,提供围绕这些数据资产的协作功能。 Atlas架构原理 Atlas安装及使用
1)Atlas官网地址:https://atlas.apache.org/ 2)文档查看地址:https://atlas.apache.org/0.8.4/index.html 3)下载地址:https://www.apache.org/dyn/closer.cgi/atlas/0.8.4/apache-atlas-0.8.4-sources.tar.gz
通常企业开发中选择集成外部的HBase+Solr,方便项目整体进行集成操作。 安装Solr5.2.1 1)Solr版本要求必须是5.2.1,见官网 2)Solr下载:http://archive.apache.org/dist/lucene/solr/5.2.1/solr-5.2.1.tgz 4)解压solr-5.2.1.tgz到/opt/module/目录下面 [kris@hadoop101 module]$ tar -zxvf solr-5.2.1.tgz -C /opt/module/ 5)修改solr-5.2.1的名称为solr [kris@hadoop101 module]$ mv solr-5.2.1/ solr 6)进入solr/bin目录,修改solr.in.sh文件 [kris@hadoop102 solr]$ vim bin/solr.in.sh #添加下列指令 ZK_HOST="hadoop101:2181,hadoop102:2181,hadoop103:2181" SOLR_HOST="hadoop101" # Sets the port Solr binds to, default is 8983 #可修改端口号 SOLR_PORT=8983 7)分发Solr,进行Cloud模式部署 [kris@hadoop101 module]$ xsync solr 提示:分发完成后,分别对hadoop102、hadoop103主机/opt/module/solr/bin下的solr.in.sh文件,修改为SOLR_HOST=对应主机名。 8)在三台节点上分别启动Solr,这个就是Cloud模式 [kris@hadoop101 solr]$ bin/solr start [kris@hadoop102 solr]$ bin/solr start [kris@hadoop103 solr]$ bin/solr start 提示:启动Solr前,需要提前启动Zookeeper服务。 9)Web访问8983端口,可指定三台节点中的任意一台IP,http://hadoop101:8983/solr/#/ 提示:UI界面出现Cloud菜单栏时,Solr的Cloud模式才算部署成功。 10)编写Solr启动停止脚本 (1)在hadoop101的/home/kris/bin目录下创建脚本 [kris@hadoop102 bin]$ vim s.sh 在脚本中编写如下内容   #!/bin/bash
case $1 in
"start"){
for i in hadoop101 hadoop102 hadoop103
do
ssh $i "/opt/module/solr/bin/solr start"
done
};;
"stop"){
for i in hadoop101 hadoop102 hadoop103
do
ssh $i "/opt/module/solr/bin/solr stop"
done
};;
esac
View Code
(2)增加脚本执行权限
[kris@hadoop101 bin]$ chmod +x s.sh
(3)Solr集群启动脚本
[kris@hadoop101 module]$ s.sh start
(4)Solr集群停止脚本
[kris@hadoop101 module]$ s.sh stop
#!/bin/bash
case $1 in
"start"){
for i in hadoop101 hadoop102 hadoop103
do
ssh $i "/opt/module/solr/bin/solr start"
done
};;
"stop"){
for i in hadoop101 hadoop102 hadoop103
do
ssh $i "/opt/module/solr/bin/solr stop"
done
};;
esac
View Code
(2)增加脚本执行权限
[kris@hadoop101 bin]$ chmod +x s.sh
(3)Solr集群启动脚本
[kris@hadoop101 module]$ s.sh start
(4)Solr集群停止脚本
[kris@hadoop101 module]$ s.sh stop
安装Atlas0.8.4 1)解压apache-atlas-0.8.4-bin.tar.gz到/opt/module/目录下面 [kris@hadoop101 module]$ tar -zxvf apache-atlas-0.8.4-bin.tar.gz -C /opt/module/ 2)修改apache-atlas-0.8.4的名称为atlas [kris@hadoop101 module]$ mv apache-atlas-0.8.4/ atlas Atlas集成外部框架 Atlas集成Hbase 1)进入/opt/module/atlas/conf/目录,修改配置文件 [kris@hadoop101 conf]$ vim atlas-application.properties #修改atlas存储数据主机 atlas.graph.storage.hostname=hadoop101:2181,hadoop102:2181,hadoop103:2181 2)进入到/opt/module/atlas/conf/hbase路径,添加Hbase集群的配置文件到${Atlas_Home} [kris@hadoop101 hbase]$ ln -s /opt/module/hbase/conf/ /opt/module/atlas/conf/hbase/ 3)在/opt/module/atlas/conf/atlas-env.sh中添加HBASE_CONF_DIR [kris@hadoop101 conf]$ vim atlas-env.sh #添加HBase配置文件路径 export HBASE_CONF_DIR=/opt/module/atlas/conf/hbase/conf Atlas集成Solr 1)进入/opt/module/atlas/conf目录,修改配置文件 [kris@hadoop101 conf]$ vim atlas-application.properties #修改如下配置 atlas.graph.index.search.solr.zookeeper-url=hadoop101:2181,hadoop102:2181,hadoop103:2181 2)将Atlas自带的Solr文件夹拷贝到外部Solr集群的各个节点。 [kris@hadoop101 conf]$ cp -r /opt/module/atlas/conf/solr /opt/module/solr/ 3)进入到/opt/module/solr路径,修改拷贝过来的配置文件名称为atlas_conf [kris@hadoop101 solr]$ mv solr atlas_conf 4)在Cloud模式下,启动Solr(需要提前启动Zookeeper集群),并创建collection [kris@hadoop101 solr]$ bin/solr create -c vertex_index -d /opt/module/solr/atlas_conf -shards 3 -replicationFactor 2 [kris@hadoop101 solr]$ bin/solr create -c edge_index -d /opt/module/solr/atlas_conf -shards 3 -replicationFactor 2 [kris@hadoop101 solr]$ bin/solr create -c fulltext_index -d /opt/module/solr/atlas_conf -shards 3 -replicationFactor 2 -shards 3:表示该集合分片数为3 -replicationFactor 2:表示每个分片数都有2个备份 vertex_index、edge_index、fulltext_index:表示集合名称 注意:如果需要删除vertex_index、edge_index、fulltext_index等collection可以执行如下命令。 [kris@hadoop101 solr]$ bin/solr delete -c ${collection_name} 创建collection的详细如下:
[kris@hadoop101 solr]$ bin/solr create -c vertex_index -d /opt/module/solr/atlas_conf -shards 3 -replicationFactor 2
Connecting to ZooKeeper at hadoop101:2181,hadoop102:2181,hadoop103:2181
Uploading /opt/module/solr/atlas_conf for config vertex_index to ZooKeeper at hadoop101:2181,hadoop102:2181,hadoop103:2181
Creating new collection 'vertex_index' using command:
http://hadoop103:8983/solr/admin/collections?action=CREATE&name=vertex_index&numShards=3&replicationFactor=2&maxShardsPerNode=2&collection.configName=vertex_index
{
"responseHeader":{
"status":0,
"QTime":5435},
"success":{"":{
"responseHeader":{
"status":0,
"QTime":5094},
"core":"vertex_index_shard1_replica1"}}}
[kris@hadoop101 solr]$ bin/solr create -c edge_index -d /opt/module/solr/atlas_conf -shards 3 -replicationFactor 2
Connecting to ZooKeeper at hadoop101:2181,hadoop102:2181,hadoop103:2181
Uploading /opt/module/solr/atlas_conf for config edge_index to ZooKeeper at hadoop101:2181,hadoop102:2181,hadoop103:2181
Creating new collection 'edge_index' using command:
http://hadoop103:8983/solr/admin/collections?action=CREATE&name=edge_index&numShards=3&replicationFactor=2&maxShardsPerNode=2&collection.configName=edge_index
{
"responseHeader":{
"status":0,
"QTime":3280},
"success":{"":{
"responseHeader":{
"status":0,
"QTime":3116},
"core":"edge_index_shard3_replica2"}}}
[kris@hadoop101 solr]$ bin/solr create -c fulltext_index -d /opt/module/solr/atlas_conf -shards 3 -replicationFactor 2
Connecting to ZooKeeper at hadoop101:2181,hadoop102:2181,hadoop103:2181
Uploading /opt/module/solr/atlas_conf for config fulltext_index to ZooKeeper at hadoop101:2181,hadoop102:2181,hadoop103:2181
Creating new collection 'fulltext_index' using command:
http://hadoop103:8983/solr/admin/collections?action=CREATE&name=fulltext_index&numShards=3&replicationFactor=2&maxShardsPerNode=2&collection.configName=fulltext_index
{
"responseHeader":{
"status":0,
"QTime":3455},
"success":{"":{
"responseHeader":{
"status":0,
"QTime":3115},
"core":"fulltext_index_shard3_replica1"}}}
View Code
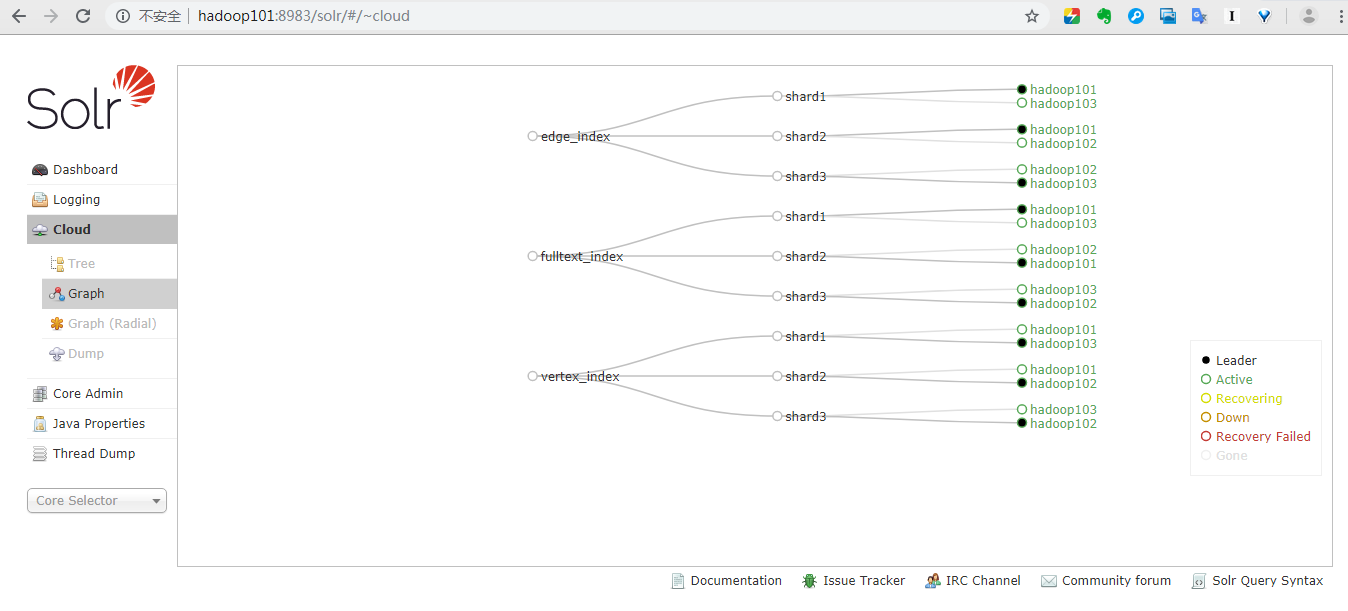
5)验证创建collection成功
登录solr web控制台:http://hadoop101:8983/solr/#/~cloud 看到如下图显示:
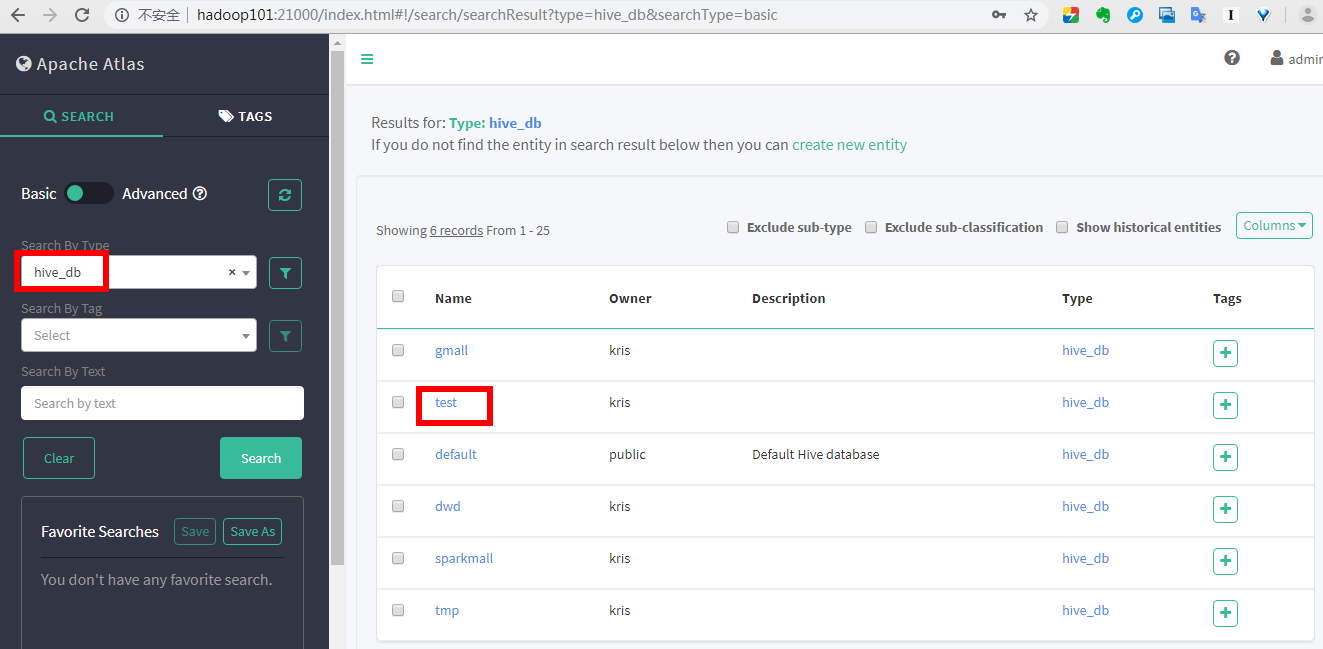
Atlas其他配置 1)进入/opt/module/atlas/conf/目录,修改配置文件atlas-application.properties [kris@hadoop101 conf]$ vim atlas-application.properties ######### Server Properties ######### atlas.rest.address=http://hadoop101:21000 # If enabled and set to true, this will run setup steps when the server starts atlas.server.run.setup.on.start=false ######### Entity Audit Configs ######### atlas.audit.hbase.zookeeper.quorum=hadoop101:2181,hadoop102:2181,hadoop103:2181 2)记录性能指标,进入/opt/module/atlas/conf/路径,修改当前目录下的atlas-log4j.xml [kris@hadoop101 conf]$ vim atlas-log4j.xml #去掉如下代码的注释 Atlas集成Hive 1)进入/opt/module/atlas/conf/目录,修改配置文件atlas-application.properties [kris@hadoop101 conf]$ vim atlas-application.properties ######### Hive Hook Configs ####### atlas.hook.hive.synchronous=false atlas.hook.hive.numRetries=3 atlas.hook.hive.queueSize=10000 atlas.cluster.name=primary 2)将atlas-application.properties配置文件加入到atlas-plugin-classloader-1.0.0.jar中 [kris@hadoop101 hive]$ zip -u /opt/module/atlas/hook/hive/atlas-plugin-classloader-0.8.4.jar /opt/module/atlas/conf/atlas-application.properties [kris@hadoop101 hive]$ cp /opt/module/atlas/conf/atlas-application.properties /opt/module/hive/conf/ 原因:这个配置不能参照官网,将配置文件考到hive的conf中。参考官网的做法一直读取不到atlas-application.properties配置文件,看了源码发现是在classpath读取的这个配置文件,所以将它压到jar里面。 3)在/opt/module/hive/conf/hive-site.xml文件中设置Atlas hook [kris@hadoop101 conf]$ vim hive-site.xml hive.exec.post.hooks org.apache.atlas.hive.hook.HiveHook [kris@hadoop101 conf]$ vim hive-env.sh #在tez引擎依赖的jar包后面追加hive插件相关jar包 export HIVE_AUX_JARS_PATH=/opt/module/hadoop-2.7.2/share/hadoop/common/hadoop-lzo-0.4.20.jar$TEZ_JARS,/opt/module/atlas/hook/hive/atlas-plugin-classloader-0.8.4.jar,/opt/module/atlas/hook/hive/hive-bridge-shim-0.8.4.jar 在Hive中创建test库,total_amount_result表:刷新页面即可实时展示出来:
hive (default)> create database test;
OK
Time taken: 0.034 seconds
hive (default)> use test;
OK
Time taken: 0.019 seconds
hive (test)> CREATE EXTERNAL TABLE total_amount_result(
> `order_id` int,
> `update_time` string,
> `deal_total_amount` double
> )row format delimited fields terminated by ','
> ;
OK
View Code
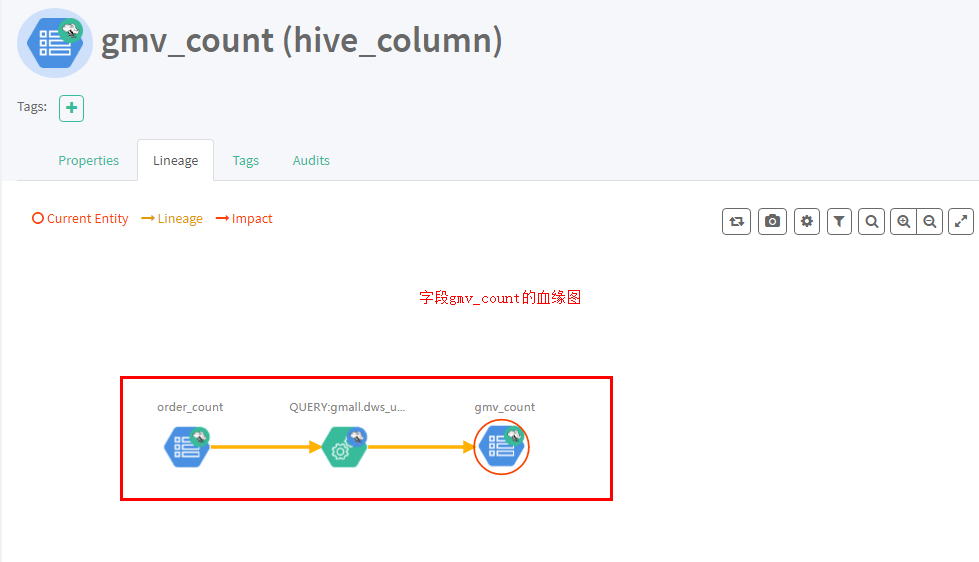
必须得跑个脚本任务atlas它才知道依赖关系,历史数据它不知道; 执行ads_gmv.sh脚本:
表之间的血缘图: Lineage血缘图、Audits记录修改时间等详情信息
字段的血缘图:
Rest API使用(二次开发使用) 如果需要对Atlas进行二次开发,可以查看官网地址,https://atlas.apache.org/api/v2/index.html,根据官方API进行二次开发。 TRANSLATE with |


【本文地址】
今日新闻 |
推荐新闻 |